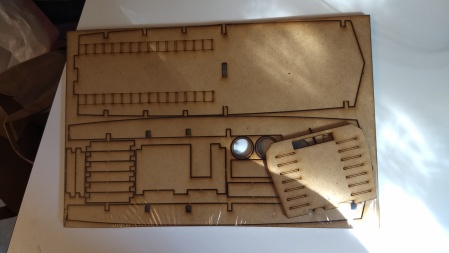
I recently purchased three 1/56th scale LCVP kits from Coresec Engineering for a D-Day scenario. The kits are in laser cut MDF and plasticard. The laser cuts are nice and clean, and all the pieces separate easily for assembly.
http://www.corseceng.com/products/28mm-lcvp-landing-craft-kit
The kits come in flat shrink-wrapped packs, with no instructions, but a bid of fiddling with trial and error resulted in a nice landing craft. Below is a step-by-step on assembling one.
- Shrink-wrapped kit, laser cut MDF on one side, laser cut plasticard on the other
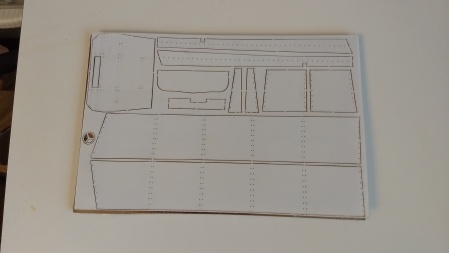
2. Separate the pieces from the MDF “sprue,” and do the same for the plasticard when you need each piece.
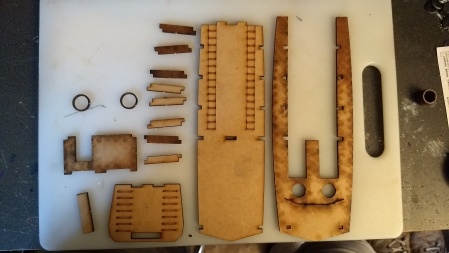
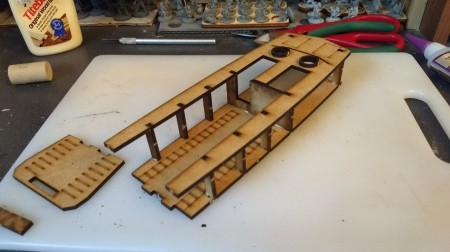
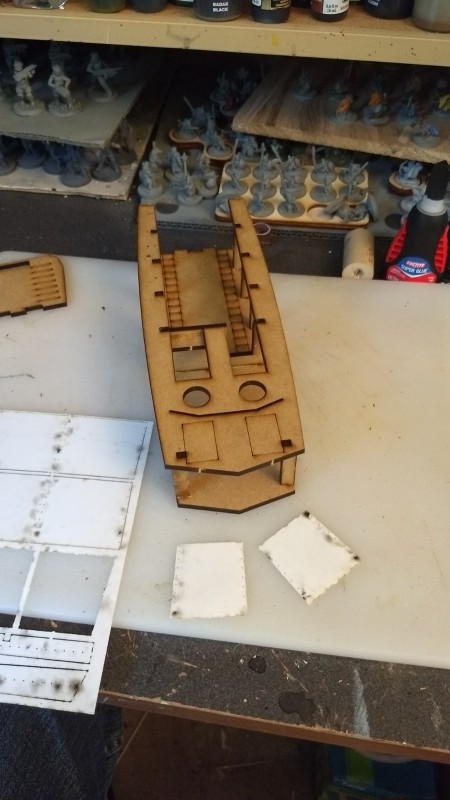
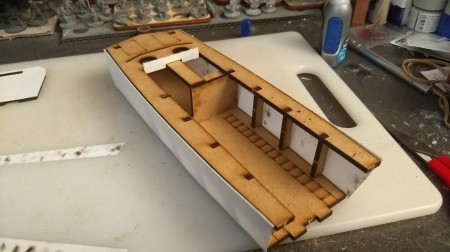
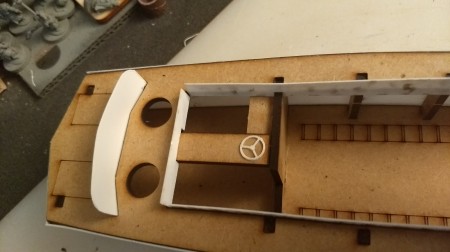
3. Assemble the hull.
- Glue the bulkhead to the bottom piece (with the tread pattern)
- Glue the ribs into place from the rear forward, one pair at a time. I found that doing the two rear ribs first allowed me to glue the upper section into place. Then glue each rib (pair by pair seemed more stable) in place to join the lower and upper hulls
- Glue the “instrument” panel into place where the driver figure will stand, on the right side making a shelf that joins with the bulkhead — under the upper hull piece
- Leave the assault ramp and round gun tubs alone for now
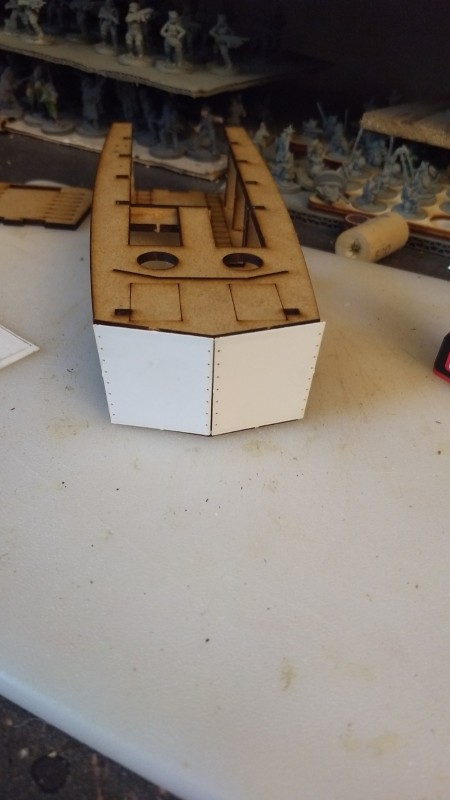
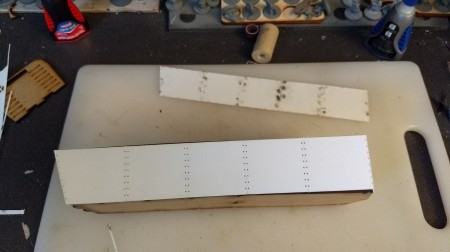
4. Glue the rear hull panels into place after cutting them from the plasticard set. The pieces glue on long side up, with the slant towards the outsides.
5. Glue the long side hull pieces onto the ribs of the boat, and use rubber bands to light hold them on while drying.
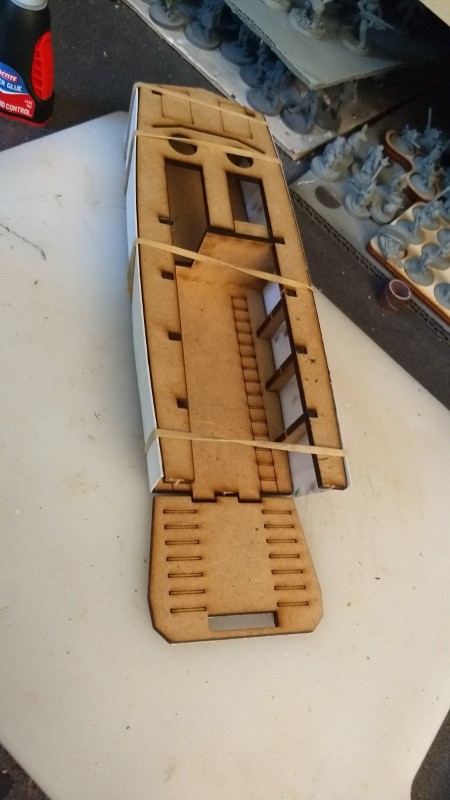
6. Glue the armored hull pieces into place on the inside of the boat kit, starting with the rear section and then both sides.
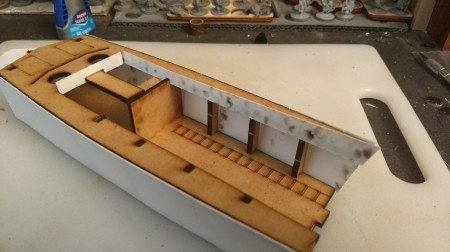
7. Glue the rear armor plate into place into the slot behind the gun tubs, as well as the two front hull pieces. The front hull pieces glue in long side up, slant outwards.
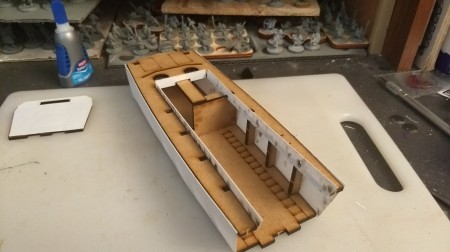
8. Glue on the two gun tubs and the steering wheel/door ramp wheel.
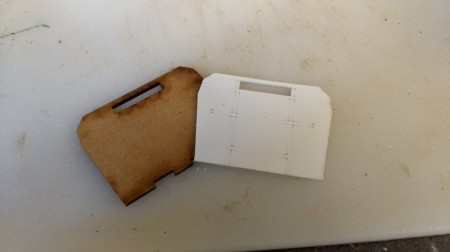
9. Glue the plasticard door plate onto the outside of the assault door/ramp. The door as the tread pattern facing the inside of the boat. Make sure the pattern etched into the door plate is facing outwards.
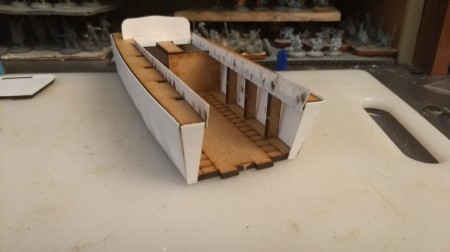
10. Add more details and bits if you like. I’ve added struts on the sides of the armor plating as well as cleats and the bollard in the rear. Magnets in the assault doors keep them closed.
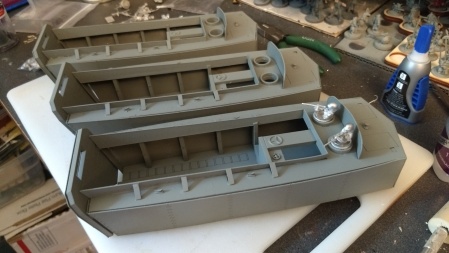
11. You can also get 28mm LVT crew figures from Company B that go well with this boat.
- Gun tub MG crew: https://company-b-models-and-miniatures.myshopify.com/collections/crews-for-afvs/products/miniatures-usn-lvta-tub-gunners2?variant=15950897667
- General LVT crew: https://company-b-models-and-miniatures.myshopify.com/products/miniatures-usn-lvta-4-crew-2?variant=15950880835

November 21, 2017 at 6:53 PM |
Hey There !
My name is Joshua Stawiarski Co – Editor Of TalkWargaming.com
Sorry if this message is presented in a spammy way,
I wanted to inquire about if you would be interested in selling published content you created that is on your website to us over here at talkwargaming.com.
If you are interested or have questions we can go over more details at: editortalkwargaming@gmail.com
Put In The Subject Heading : “ Wargame Creator ”
Looking forward to hearing from you,
Sincerely,
Co – Editor Of talkwargaming.com